Pages

Saturday, March 25, 2017

Step by Step Installing Active Directory Certificate server


This step-by-step guide describes the steps needed to set up a basic configuration of Active Directory Certificate Services

Open Server Manager – Manage – Add Roles and Features


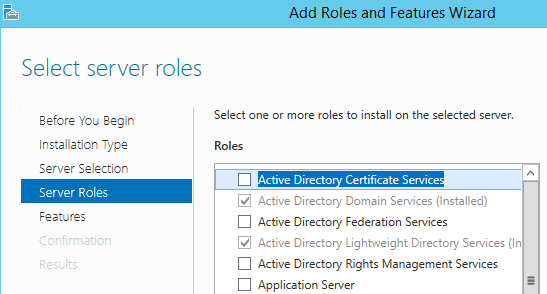
Select "Active Directory Certificate Services".


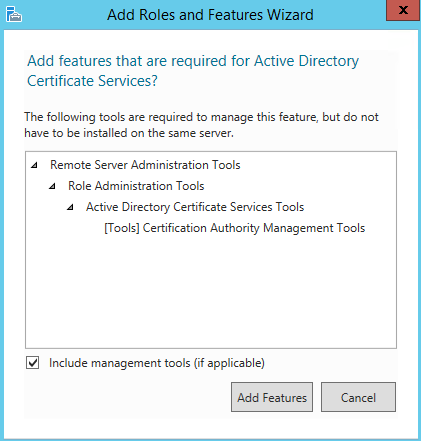
Add Features.


On the Features Page Click Next.


Click Next.


Select the below options and click next.


Click Next on the Below Screen


Select the appropriate options and Click Next.


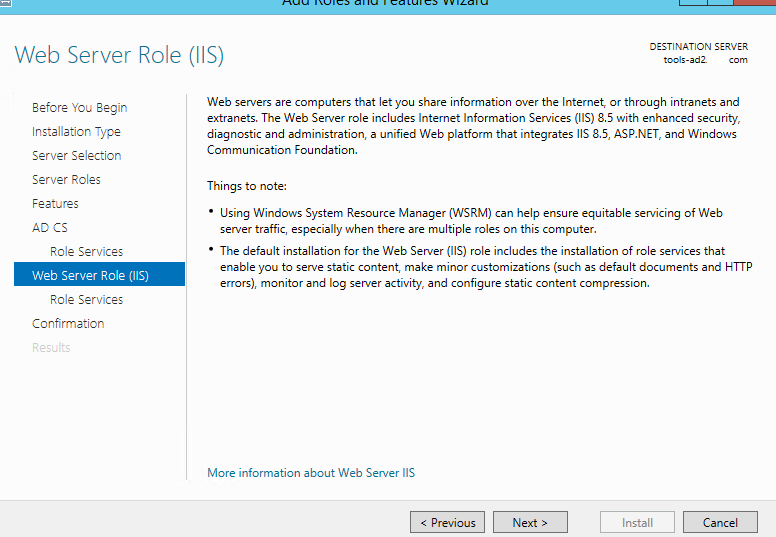
On the below screen select Next.


Click Close once the installation completes.


Specify Admin Credentials.


Select Appropriate roles and click Next.


Choose Enterprise CA and click Next.


Select CA type as Root CA


Select New Private Key and click Next.


Select SHA1 and click Next.


Click Next on the below screen


Select the Validity Period and click Next.


Specify the Data Base Location


Click on Configure.


Click Close.


Installation and Configuration has been completed.

we will check if we are able to open the Certificate Authority server..open the browser and enter Certificate authority server FQDN you should be able to see below page.


Step by Step Installing ADFS Proxy server-Part-2


In this post I will be installing and configuring ADFS WAP ( Web Application Proxy)

What is ADFS Proxy

The AD FS 3.0 Proxy is a service that brokers a connection between external users and your internal AD FS 3.0 server. It acts as a reverse proxy and typically resides in your organization's perimeter network.

The Web Application Proxy (WAP) is a role service of the Remote Access server role in Windows Server 2012 R2. One of the primary roles of the WAP is to performs pre-authenticates access to web applications using Active Directory Federation Services (AD FS), and in this capacity the WAP functions as an AD FS proxy.

Start Add Roles and Features on the WAP Proxy server
Select Role-based or feature-based installation, and click Next
On the Below screen select "Remote Access" and click next 

Click next on the features selection page.
Click Next.
Click on Add Features

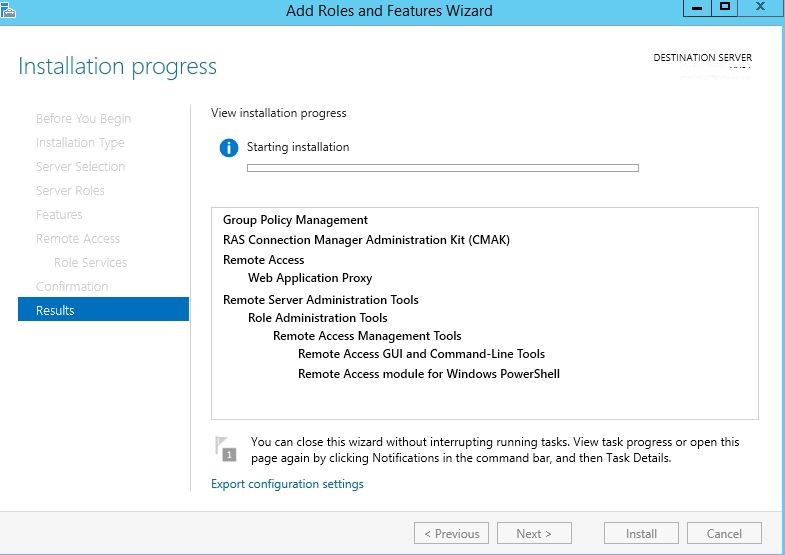
In the below screen select Close.
Click Next.
Enter Federation Service name
Enter Administrator credentials.
Select Appropriate Certificate and Click Next.
Click Next to Configure 
Wait until the WAP has completes the configuration it might take some to complete the configuration.
Click on Close that completed WAP installation and configuration
We have successfully completed installation of ADFS proxy server 


Step by Step Installing ADFS Server-Part-1

In this post I will be installing and configuring the Active Directory Federation Services [AD FS] server role. AD FS is able to provide Single-Sign-On [SSO] capabilities to multiple web application using a single Active Directory account.

Install the AD FS Server Role:

Open Server Manager and click Manage -> Add Roles and Features:

On the below screen select Active Directory Federation Servers.Click Next


On the Below screen click next


Click Next.


On the Below screen click next to Install


Once the installation complete click Close.


Post-Deployment Configuration:

Since this is the first ADFS server please select "Create First ADFS server Federation Farm"


Before proceed to next step. Please ensure the account is having Active directory domain admin permissions and then click next.


SSL Certificate: Select the drop down menu you can find out the certificates installed, select the appropriate certificate.

Federation Service Name : Enter Federation service name ex: STS.Contoso.com

Display Name : Enter Display Name


Select Use existing Domain user and enter proper credentials.


Database Type:

The choice of the database type directly impacts what you can (or cannot) do. In some way, it also dictates how you should setup your federation servers. The table below depicts some of the most important differences between SQL and the Windows Internal Database when used as configuration database store for AD FS:

AD FS) FeatureWindows Internal Database (WID)SQL Server
ScalabilityLimited to five servers in the farmNo limitation
High Availabilitybuilt-in “replication” mechanismNeeds SQL cluster
Adv. featuresNot availableSAML artifact resolution &
SAML/WS-Federation token replay detection
In my case i have chose WID ( Windows Internal Database). Click Next


Click Close.


ADFS installation has been completed.

To Test if it working open the Browser enter : https://adfs.contoso.com/adfs/ls/ldpintiatedSignOn.


Monday, April 18, 2016

Skype for Business Online to On-Premise Migration

In this Blog we will see how to migrate Skype for Business Online to Lync / Skype for Business On-Premise.

Current situation 

Customer looking to utilize current on-premise IP Telephony solution. So we have decided to have Lync Hybird solution so that Lync on-premise users can leverage existing on-premise IP telephony.

Before proceeding further you have to deploy full fledged Lync on-premise solution. Here i would think that you have already one.along with Lync environment you also needs to ahve Dir Sync server has we are setting up hybrid with O365. your current On-premise AD need to be extended to O365 Azure AD in order to synchronize password with O365.

Below are the required components in order to build Hybird.

1) On-Premise Domain services
2) Dir Sync / AD Connect
3) Complete Lync /SFB  On-Premise Environment

Below are the steps needed to specifically enable Hybrid and move users back to on-premises.

Lync On-Premise Side

Set-CSAccessEdgeConfiguration -AllowOutsideUsers 1 -AllowFederatedUsers 1 -UseDnsSrvRouting -EnablePartnerDiscovery $true

 Skype for Business Online

Download and install Skype for Business online Powershell ( https://www.microsoft.com/en-us/download/details.aspx?id=39366 )

Import Powershell Skype for Business Online.

Import-Module SkypeOnlineConnector $cred = Get-Credential $CSSession = New-CsOnlineSession -Credential $cred Import-PSSession $CSSession –AllowClobber.

Enable your tenant for Shared SIP Address Space

Set-CsTenantFederationConfiguration -SharedSipAddressSpace $True

Remove existing Lync/Skype for Business Hosting Rule

Get-CSHostingProvider -Identity <SFB Online> | Remove-CSHostingProvider

Recreate Skype for Business Online Provider with Hybrid Specific Configuration

New-CSHostingProvider -Identity SFBOnline -ProxyFqdn "sipfed.online.lync.com" -Enabled $true -EnabledSharedAddressSpace $true -HostsOCSUsers $true -VerificationLevel UseSourceVerification -IsLocal $false -AutodiscoverUrl https://webdir.online.lync.com/Autodiscover/AutodiscoverService.svc/root

Update External/Public DNS Records

Edge Names (SIP Access/Web Conference/ AV  FQDNs)
External Web Services FQDN
Dialin FQDN
Meeting FQDN
LyncDiscover FQDN
SRV _sipfederationtls._tcp.domain.com
SRV _sip._tls.domain.com


Enable Test User

Enable-CsUser -Identity <account> -SipAddress <sipaddress> -HostingProviderProxyFqdn "sipfed.online.lync.com" –verbose

Skype for Business Online Side 

Login to Skype for Business online Powershell.

Move-CsUser -Identity <UPN> -Target <FE Pool Name> -Credential $cred -HostedMigrationOverrideURL https://admin0f.online.lync.com/HostedMigration/hostedmigrationservice.svc

Hope this is help Full :)
   

Friday, April 15, 2016

Skype For Business Cloud Connector Edition Released


Current Solution

If any organization wanting to leverage the enterprise grade PBX functionality offered by Skype for Business, must deploy the on premise environment hybrid mode with O365 solution, Skype for Business Server.So that users Homed in On-Premise SFB can leverage enterprise voice capabilities.

With Current release of CCE you will not required entire Skype for Business environment for PSTN Capability.

What is Skype for Business Cloud Connector Edition ( CCE)

Skype for Business Cloud Connector Edition is a package of virtual machines for deployment within an organization's infrastructure that enables public switched telephone network (PSTN) connections with Microsoft's Cloud PBX service.

"With Cloud Connector Edition, you deploy a set of packaged VMs that contain a minimal Skype for Business Server topology -- consisting of an Edge component, Mediation component, and a Central Management Store (CMS) role. You will also install a domain controller, which is required for the internal functioning of Cloud Connector. These services are configured for hybrid with your Office 365 tenant that includes Skype for Business Online services."

Read here for More detailed information Technet Article 

To Download CCC Link to Download

Tuesday, April 5, 2016

Moving On-Premise Lync User's to O365 cloud

In this Blog we will moving users to O365 cloud.

Before actually moving user's to Office 365, Please check with users are synchronized to O365 and licenses are assigned to particular migrating users.

Step 1

Open the new Lync Management Shell session and launch the remote session. We have to add the –AllowClobber parameter so that the Lync Online module's cmdlets are able to overwrite the corresponding Lync Management Shell cmdlets:

$credential = Get-Credential
$session = New-CsOnlineSession -Credential $credential
Import-PSSession $session -AllowClobber 

Step 2

Open the O365 Lync Admin Center  by going to Service settings | Lync | Manage settings in the Lync Admin Center, and copy URL, for example, https://admin0e.online.lync.com.

Step 3

Add the following string to the URL /HostedMigration/hostedmigrationservice.svc which we have copied earlier.

https://admin0e.online.lync.com/HostedMigration/hostedmigrationservice.svc 

Step 4

The following Command will move users from Lync on-premises to Lync Online.

Move-CsUser -Identity ramesh@contoso.com –Target sipfed.online.lync.com -Credential $creds-HostedMigrationOverrideUrl https://admin0e.online.lync.com/HostedMigration/hostedmigrationservice.svc
Step 5

To check if user moved to Lync Online use the below command
Get-CsUser | fl DisplayName,HostingProvider,RegistrarPool,SipAddress command.

Saturday, April 2, 2016

Configuring Azure VM with Multiple NIC's

The below instructions below will help you create a VM with Multiple NIC in Azure.

In Order to Run the Blow Commands you have you install the Azure Poweshell follow this

https://azure.microsoft.com/en-us/documentation/articles/powershell-install-configure/


To create a VM with multiple NICs, follow the steps below:

Select a VM image from Azure VM image gallery. Note that images change frequently and are available by region.

Step 1

$image = Get-AzureVMImage -ImageName $imagename

$image = Get-AzureVMImage `
    -ImageName "a699494373c04fc0bc8f2bb1389d6106__Windows-Server-2012-R2-20150726-en.us-127GB.vhd"

Step 2
Create a VM configuration.

$vm = New-AzureVMConfig -Name "Edge2nics" -InstanceSize "Large" -Image $image

Step 3
Create the default administrator login.

Add-AzureProvisioningConfig –VM $vm -Windows -AdminUserName “ramesh123” -Password “password123”

Step 4

Set the configuration of the “default” NIC

Set-AzureSubnet -SubnetNames "Subnet-2" -VM $vm

Set-AzureStaticVNetIP -IPAddress "10.0.1.74" -VM $vm

Step 5

Add additional NICs to the VM configuration.

Add-AzureNetworkInterfaceConfig -Name "Ethernet2" -SubnetName "Subnet-1" -StaticVNetIPAddress "10.0.0.14" -VM $vm

Step 6

Create the VM in your virtual network

New-AzureVM -ServiceName "easyedge02" –VNetName “Lync” –VM $vm


To Update New IP Address for Existing VM which is already with Dual NIC configured

Get-AzureVM -ServiceName Easyedge01 -Name Lyncedge1 | Set-AzureStaticVNetIP -IPAddress "10.0.0.12" | Update-AzureVM