Installing Lync On Azure
In the previous blog we have seen the configuration of Azure and installing Domain controller. In this blog we will see how to install Lync 2013 standard edition.
Create the Virtual machine to install Lync select Virtual Machine
Select the Computer and select Virtual Machine and select From Gallery
This is the important step when creating the VM's from Azure portal. Select the Region/Affinity group which we have created earlier and the Virtual network Subnets. So the VM's will be assigned the subnet IP Address which you have selected.
Select the Tick Mark to find the VM creation.
Assigning static IP address to the Lync VM Machine.
1) First we need to download and install the Azure Power shell Module form this link http://go.microsoft.com/fwlink/p/?LinkId=320376
Note: To Install the Azure Power shell Module require .Net
frame work 4.5
To connect to Azure Subscription
1) Type the following command to connect to Azure Subscription : Add-AzureAccount
2) Enter the user and password when it prompts you
3) $cred = Get-Credential
4) Add-AzureAccount -Credential $cred
5) Just to check your Azure Subscription : Get-AzureSubscription
To assign the static IP Address for the Azure VM Machine
Get-AzureVM -ServiceName Lyncstd -Name Lyncstd | Set-AzureStaticVNetIP -IPAddress 10.0.0.6 | Update-AzureVM
Installing Lync 2013
Login to the Azure Portal and select the VM which you needs to connect. In the down below right corner select Connect it will download the RDP File.
Click on the downloaded RDP File and enter the Credentials
Join the machine to domain ex: contoso.com
Pre-Requisites installing Lync 2013 on Windows 2012 R2
Run as Administrator Powershell on your Lync server and copy paste the Below cmdlet to install the Pre-Requisites.:
Run as Administrator Powershell on your Lync server and copy paste the Below cmdlet to install the Pre-Requisites.:
Install-WindowsFeature RSAT-ADDS, Web-Server, Web-Static-Content, Web-Default-Doc, Web-Http-Errors, Web-Asp-Net, Web-Net-Ext, Web-ISAPI-Ext, Web-ISAPI-Filter, Web-Http-Logging, Web- Log-Libraries, Web-Request-Monitor, Web-Http-Tracing, Web-Basic-Auth, Web-Windows-Auth, Web-Client-Auth, Web-Filtering, Web-Stat-Compression, Web-Dyn-Compression, NET-WCF-HTTP-Activation45, Web-Asp-Net45, Web-Mgmt-Tools, Web-Scripting-Tools, Web-Mgmt-Compat, Windows-Identity-Foundation, Desktop-Experience, Telnet-Client, BITS -Source D:\sources\sxs
Browse to the lync 2013 setup file, Double click on Setup.exe
Click Yes
Click install
Accept the License agreement
Click Finish
Click Next
From the Deployment Wizard Screen " Prepare Current Domain " Click Run
Click Next
Click on Finish
Add the administrator account to the Member of CSAdministrator and RTCUniversalServerAdmins
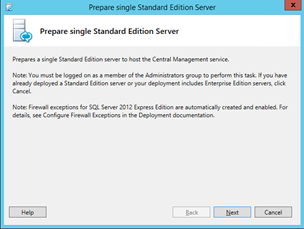
Select Prepare First Standard edition Server form the Lync Deployment Wizard screen
Click Next
Click on Finish
Now for the Lync Deployment Wizard select " install Administrative Tools"
Once the tools are installed you will see Lync Topology builder select it
Select New Topology from the Below screen
Type the Primary SIP Domain
Enter any Secondary SIP Domains if any and click on Next
Give the Name of the Site
Enter the details in the Fields on the screen below and click Next
Click Finish
Click Next
Select Standard edition server in the below screen and enter the FQDN as said earlier we are installing Standard Edition server. If you are will to install Enterprise Edition there is an Know issue the installation will fail while installing database. Because in Azure disks have read/write host cache enabled. So the solution is to attach an additional hard disk to the VM with no read write cache. Here I am not going to show how to create the additional Hard Disk please check this Link for creating the same https://guybachar.wordpress.com/2014/05/19/building-a-lync-2013-lab-on-windows-azure-notes-from-the-field/
In the below screen select the features which you are going to install
Select Collocate mediation server as I am going to collocate mediation server. And click next.
Click next
Now we will create the Lync File share now you can create the folder in C: Drive as this is an Lab Machine I am creating in C: drive. Create the folder and right click properties we have to give these permissions to this folder
RTCHS Universal Services
RTC Component Universal Services
RTC Universal Server Admins
RTC Universal Config Replicator
Give full permissions
In the below screen type the File server FQDN and enter the File share which you have created before.
In the below screen specify the URL
Click Finish
Right click on Lync server edit properties. Scroll down Under central Management Server. Select the Server
Right click on the Lync server and select Publish Topology.
In the below screen click Next
Click Finish
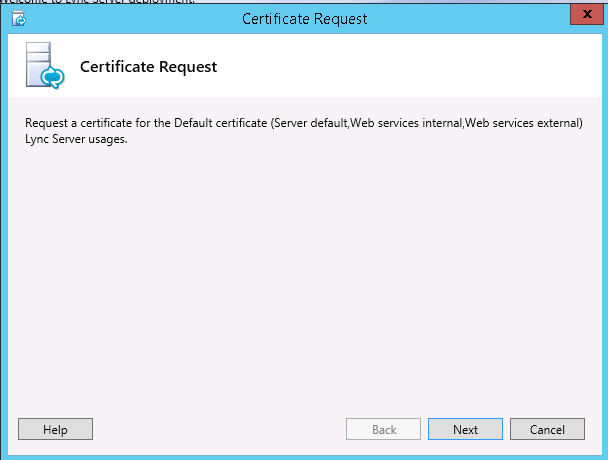
Certificate Request open the Lync Deployment Wizard. And click run on Request, Install or Assign Certificates
In the Below screen click on Request to request the new certificate
Select CA Server and click on next
Click Next
In the next screen click Finish
And click finish
Click next
Enter name and click next
Enter details and click next
Click next. And in the next screen click finish.
Assign the Oauth certificate.
For configuring DNS records check this link http://mslyncforall.blogspot.in/2015/04/lync-2013-dns-records.html
Verify that all the Lync services are running


Did you managed to deploy Lync Edge in Azure?
ReplyDeleteDid you managed to deploy Lync Edge in Azure?
ReplyDelete