Pages

Monday, August 28, 2017

Restore Softdeleted O365 Mail box

In this Blog we will see how to Restore an Soft Deleted Mail box in O365


Connect to Office 365 using below powershell commands 

$UserCredential = Get-Credential 

$Session = New-PSSession -ConfigurationName Microsoft.Exchange -ConnectionUri https://outlook.office365.com/powershell-liveid/ -Credential $UserCredential -Authentication Basic -AllowRedirection 

Import-PSSession $Session

Command To List all the Soft Deleted Mailboxs.

Get-Mailbox -SoftDeletedMailbox | Select DisplayName,ExchangeGuid,PrimarySmtpAddress,ArchiveStatus,DistinguishedName

Below command to export all the Soft Deleted mail boxes to an Excel

Get-Mailbox -SoftDeletedMailbox | Select DisplayName,ExchangeGuid,PrimarySmtpAddress,ArchiveStatus,DistinguishedName | Export-Csv c:\Softdeleted.csv

From the above command identify the mail box which we are trying to restore and copy the ExchangeGUID

$SoftMailbox = Get-Mailbox -SoftDeletedMailbox <Exchagne GUID>

Mail Box Move request 

New-MailboxRestoreRequest -SourceMailbox $SoftMailbox.DistinguishedName -TargetMailbox <Enter Traget mailbox where to restore mail@contoso.com> –AllowLegacyDNMismatch

To check the Restore Progress 

Get-MailboxRestoreRequest -Identity mail@contoso.com

To get the progress in Percentage Complete 

Get-MailboxRestoreRequestStatistics -Identity mail@contoso.com


Hope this help any one trying to restore Softdeleted mailboxes

Tuesday, August 8, 2017

Enabling litigation hold on O365

Enabling Litigation hold for O365 users

There are multiple ways to give access to an users who left organization

1) Place mail box in Litigation Hold
2) Convert to Shared mail box.

What is litigation Hold?

Place a mailbox on Litigation Hold to preserve all mailbox content, including deleted items and original versions of modified items. When you place a mailbox on Litigation Hold, the user's archive mailbox (if it's enabled) is also placed on hold. Deleted and modified items are preserved for a specified period or until you remove the mailbox from Litigation Hold.

when you place an Mail box in Litigation hold the mail will be preserved in X amount of days, we can give the mail box access to any person who has re-placed him in the organization.

all these mail boxes will be listed in the Inactive mail boxes and can we and can be attached to respective users who required access to the mails

Below are the commands to place the mail boxes in litigation hold

Connect to O365 power shell before executing below commands

To place an user to Litigation hold

The below command will place an particular mail box under litigation hold for 10 Years

Set-Mailbox ramesh@contoso.com -LitigationHoldEnabled $true -LitigationHoldDuration 3665

The Below command will place mail box under litigation hold for indifinate years

Set-Mailbox ramesh@contoso.com -LitigationHoldEnabled

Enable Litigation hold for all the O365 users

Get-Mailbox -ResultSize Unlimited -Filter {RecipientTypeDetails -eq "UserMailbox"} | Set-Mailbox -LitigationHoldEnabled $true -LitigationHoldDuration 3665

Enable Litigation hold for only not enabled users

Get-Mailbox | Where {$_.LitigationHoldEnabled -match "False"} | ForEach-Object {
$Identity = $_.alias; Set-Mailbox -Identity $Identity -LitigationHoldEnabled $True } 

Convert to Shared mail box

Once the users lefts the organization we can convert his mail box to an Shared mail box and we can retain the License, for shared mail boxes license is not required.
the mail box can be given access to the respective users for the left user's historical mail for compliance purpose   

Set-Mailbox -Identity <MailboxIdentity> -Type Shared

Set-Mailbox -Identity ramesh@contoso.com -Type Shared


Monday, August 7, 2017

Unable to Load Azure active directory power shell Module

Unable to Load Azure active directory power shell Module

When i try to launch Azure Active Directory module it was keep on saying that unable to load the module

 
Checked my Machine configuration by using $PSVersionTable 

Below is my machine configuration 

Name                                             Value
----                                                 -----
CLRVersion                                     2.0.50727.5485
BuildVersion                                   6.1.7601.17514
PSVersion                                       2.0
WSManStackVersion                      2.0
PSCompatibleVersions                   1.0, 2.0
SerializationVersion                        1.1.0.1
PSRemotingProtocolVersion           2.1


My Machine has winrm 2.0 in order to load the azure active directory power module to work we required 
windows management framework 3.0 here is the link to download WMF 3.0  

once the windows management framework 3.0 got installed on my machine Azure active directly power shell got connected with out any issues


Hope this helps any one who are having issues to load the azure active directly power shell. 

Friday, March 31, 2017

Change Primary SMTP address on O365

In this Blog we will how to change Primary SMTP address on O365 which is synced from AAD Connect.

The objects which are synced from AD to O365 we cannot change at O365 level it will throw an " it is beyond users write scope" in order to do this we have to user power shell to change the SMTP address.

let say if we want to change users’ email address from user@domain.onmicrosoft.com to user@domain.com.

Login to windows power shell and connect to O365.

Below are the commands to Login to O365.

$UserCredential = Get-Credential

$Session = New-PSSession -ConfigurationName Microsoft.Exchange -ConnectionUri https://outlook.office365.com/powershell-liveid/ -Credential $UserCredential -Authentication Basic -AllowRedirection

Import-PSSession $Session

Use the below power shell command

Set-Mailbox user@domain.onmicrosoft.com -WindowsEmailAddress username@domain.com.


Exempt MFA from Corporate network using Azure and ADFS Claim Rules

In this blog we will see how to Exempt MFA additional security for the users from Corporate network and using ADFS Claim Rules.

What is MFA ?

Multi-factor authentication (MFA) is a method of authentication that requires the use of more than one verification method and adds a second layer of security to user sign-ins and transactions

IP Whitelist allows administrators to add an extra level of security and convenience by only requiring users to perform MFA when accessing resources from outside their corporate network. This can be done two ways:

Whitelisting of IP addresses: White-listing of IP Address in Azure portal.

Configuring claim rules in AD FS: Configure ADFS Claim rules to Exempt MFA from Corporate Network

Whitelisting of IP addresses

Login in to https://manage.windowsazure.com

Select Active Directory in the below screen.


Once you select Active Directory search for Office and select Exchange from the below screen.


Select Configure in the Below screen.


Enable Access Rules : ON

Apply to : Depending up on your requirement select All users/Groups

 Rules : Requires MFA when not at work. it will only prompt MFA when users try to access from outside the corporate network.

Rules : Under rules select "click here to define/edit your work network location. it will redirect to other page you have to list out all the Public IP Address of you work Network.


in the below screen under trusted IP's enter all the required IP's to Exempt user for MFA and click Save.


It might take 24 hours to Propagate in all the O365 servers.

ADFS Claim Rules to Exempt MFA

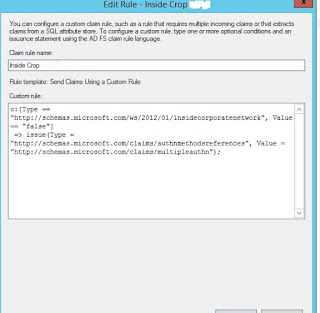
Open ADFS configuration Manager, Click on Edit Claim rules and create new claim rule.


Below is the Claim Rule


Hope this helps!!!!

Sunday, March 26, 2017

To Bulk Enable MFA for the O365 users


In this Blog i will show to Bulk enable MFA for the list of user in O365

Below is the command to enable MFA from the list of users. Create an CSV file and list out all the users which needs to be enable MFA

$auth = New-Object -TypeName Microsoft.Online.Administration.StrongAuthenticationRequirement
$auth.RelyingParty = "*"
$auth.State = "Enabled"

Import-csv C:\test.csv | Foreach{ Set-MsolUser -UserPrincipalName $_.UserPrincipalName -StrongAuthenticationRequirements $auth}  >C:\test1.csv 


To the get the output of the MFA enable users

$Users=Import-csv C:\test.csv | foreach {get-msoluser -userprincipalname $_.userprincipalname}
$Users| select DisplayName,@{N='Email';E={$_.UserPrincipalName}},@{N='StrongAuthenticationRequirements';E={($_.StrongAuthenticationRequirements.State)}} | Export-Csv -NoTypeInformation c:\test0.csv

Below is the reference link

https://support.office.com/en-us/article/Set-up-multi-factor-authentication-for-Office-365-users-8f0454b2-f51a-4d9c-bcde-2c48e41621c6?ui=en-US&rs=en-US&ad=US

Azure AAD Connect Power Shell Command

In this Blog few Important commands for Daily administrative tasks

Connect to Azure AD

Open Azure Powershell Module and enter below commands to connect.

Connect-MsolService
Import-Module ADSync

Below commnad for any delta changes in AD
Start Delta Sync
Start-AdSyncSyncCycle delta

Below Commnad for Major changes which requires to Sync to O365.
Start Full Sync
Start-AdSyncSyncCycle initial


Remove a user
remove-msoluser -UserPrincipalName sa_test@Contoso.onmicrosoft.com -force

Remove a user from recycle bin
remove-msoluser -UserPrincipalName sa_test@Contoso.onmicrosoft.com -force -RemoveFromRecycleBin

Restore a user from Recycle Bin
restore-msoluser -UserPrincipalName sa_test@Contoso.onmicrosoft.com


Below is the script to force Password synchronization 

$adConnector = "Contoso.com,"
$aadConnector = "Contoso.com - AAD"
Import-Module adsync
$c = Get-ADSyncConnector -Name $adConnector
$p = New-Object Microsoft.IdentityManagement.PowerShell.ObjectModel.ConfigurationParameter “Microsoft.Synchronize.ForceFullPasswordSync”, String, ConnectorGlobal, $null, $null, $null
$p.Value = 1
$c.GlobalParameters.Remove($p.Name)
$c.GlobalParameters.Add($p)
$c = Add-ADSyncConnector -Connector $c
Set-ADSyncAADPasswordSyncConfiguration -SourceConnector $adConnector -TargetConnector $aadConnector -Enable $false
Set-ADSyncAADPasswordSyncConfiguration -SourceConnector $adConnector -TargetConnector $aadConnector -Enable $true

Full Password Sync
https://azure.microsoft.com/en-us/documentation/articles/active-directory-aadconnectsync-implement-password-synchronization/#trigger-a-full-sync-of-all-passwords

Saturday, March 25, 2017

Step by Step Installing Active Directory Certificate server


This step-by-step guide describes the steps needed to set up a basic configuration of Active Directory Certificate Services

Open Server Manager – Manage – Add Roles and Features


Select "Active Directory Certificate Services".


Add Features.


On the Features Page Click Next.


Click Next.


Select the below options and click next.


Click Next on the Below Screen


Select the appropriate options and Click Next.


On the below screen select Next.


Click Close once the installation completes.


Specify Admin Credentials.


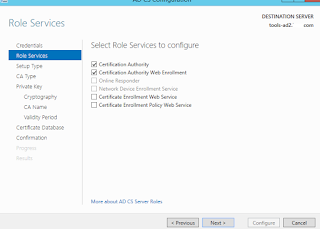
Select Appropriate roles and click Next.


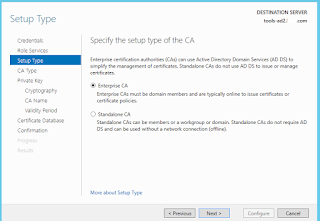
Choose Enterprise CA and click Next.


Select CA type as Root CA


Select New Private Key and click Next.


Select SHA1 and click Next.


Click Next on the below screen


Select the Validity Period and click Next.


Specify the Data Base Location


Click on Configure.


Click Close.


Installation and Configuration has been completed.

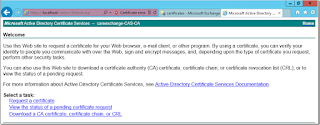
we will check if we are able to open the Certificate Authority server..open the browser and enter Certificate authority server FQDN you should be able to see below page.


Step by Step Installing ADFS Proxy server-Part-2


In this post I will be installing and configuring ADFS WAP ( Web Application Proxy)

What is ADFS Proxy

The AD FS 3.0 Proxy is a service that brokers a connection between external users and your internal AD FS 3.0 server. It acts as a reverse proxy and typically resides in your organization's perimeter network.

The Web Application Proxy (WAP) is a role service of the Remote Access server role in Windows Server 2012 R2. One of the primary roles of the WAP is to performs pre-authenticates access to web applications using Active Directory Federation Services (AD FS), and in this capacity the WAP functions as an AD FS proxy.

Start Add Roles and Features on the WAP Proxy server
Select Role-based or feature-based installation, and click Next
On the Below screen select "Remote Access" and click next 

Click next on the features selection page.
Click Next.
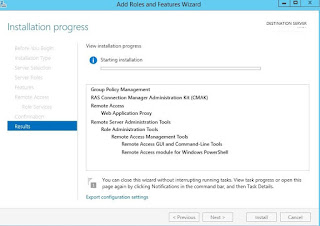
Click on Add Features

In the below screen select Close.
Click Next.
Enter Federation Service name
Enter Administrator credentials.
Select Appropriate Certificate and Click Next.
Click Next to Configure 
Wait until the WAP has completes the configuration it might take some to complete the configuration.
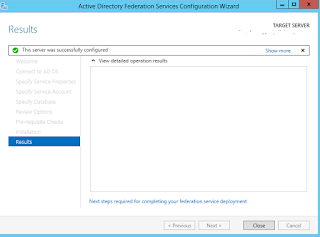
Click on Close that completed WAP installation and configuration
We have successfully completed installation of ADFS proxy server 


Step by Step Installing ADFS Server-Part-1

In this post I will be installing and configuring the Active Directory Federation Services [AD FS] server role. AD FS is able to provide Single-Sign-On [SSO] capabilities to multiple web application using a single Active Directory account.

Install the AD FS Server Role:

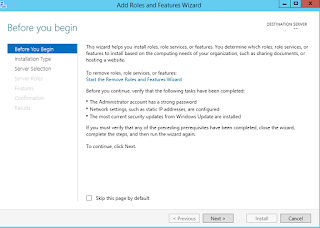
Open Server Manager and click Manage -> Add Roles and Features:

On the below screen select Active Directory Federation Servers.Click Next


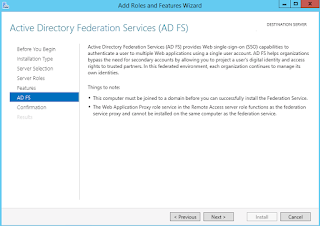
On the Below screen click next


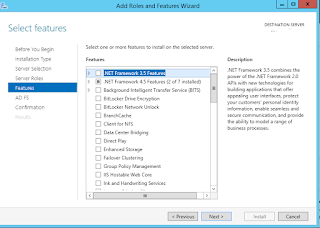
Click Next.


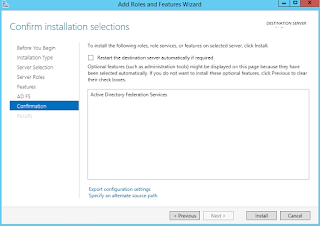
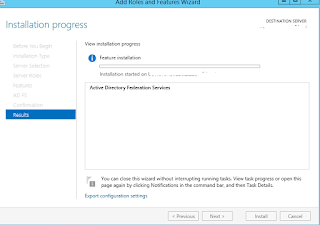
On the Below screen click next to Install


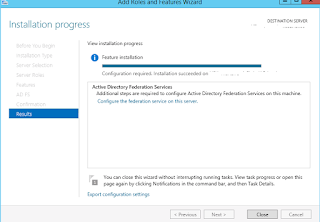
Once the installation complete click Close.


Post-Deployment Configuration:

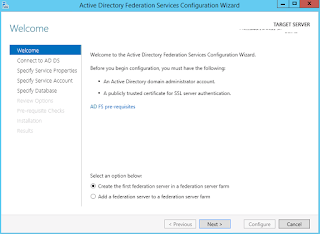
Since this is the first ADFS server please select "Create First ADFS server Federation Farm"


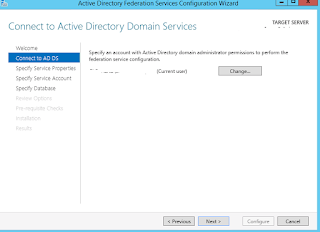
Before proceed to next step. Please ensure the account is having Active directory domain admin permissions and then click next.


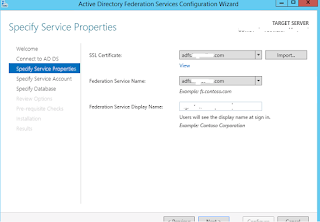
SSL Certificate: Select the drop down menu you can find out the certificates installed, select the appropriate certificate.

Federation Service Name : Enter Federation service name ex: STS.Contoso.com

Display Name : Enter Display Name


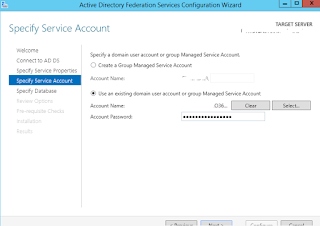
Select Use existing Domain user and enter proper credentials.


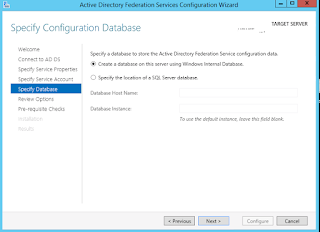
Database Type:

The choice of the database type directly impacts what you can (or cannot) do. In some way, it also dictates how you should setup your federation servers. The table below depicts some of the most important differences between SQL and the Windows Internal Database when used as configuration database store for AD FS:

AD FS) FeatureWindows Internal Database (WID)SQL Server
ScalabilityLimited to five servers in the farmNo limitation
High Availabilitybuilt-in “replication” mechanismNeeds SQL cluster
Adv. featuresNot availableSAML artifact resolution &
SAML/WS-Federation token replay detection
In my case i have chose WID ( Windows Internal Database). Click Next


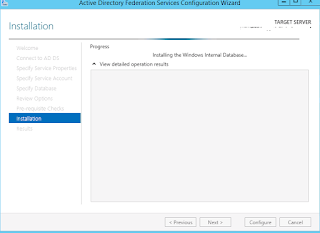
Click Close.


ADFS installation has been completed.

To Test if it working open the Browser enter : https://adfs.contoso.com/adfs/ls/ldpintiatedSignOn.